Inventory Count allows you to:
- Reconcile expected and actual inventory for all or selected items.
- Identify inventory loss or surplus.
- Keep a document record for each count.
Note: Inventory Count is part of Advanced Inventory Management and requires an active subscription. See Advanced Inventory Management Overview to learn how to activate it.
Creating an Inventory Count
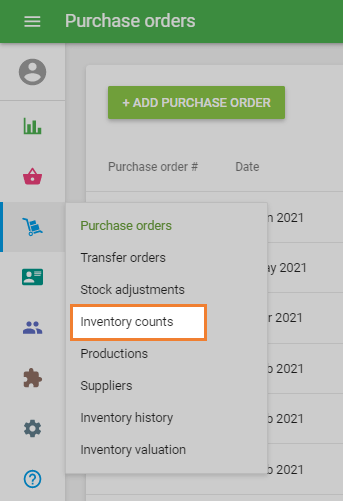
In the Back Office, go to Inventory Management → Inventory Count.
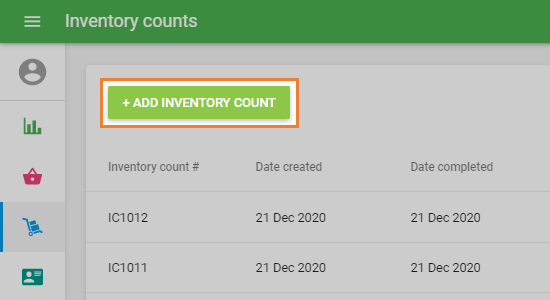
Click + Add Inventory Count.
In the Create Inventory Count form:
- Select the store where the count will take place.
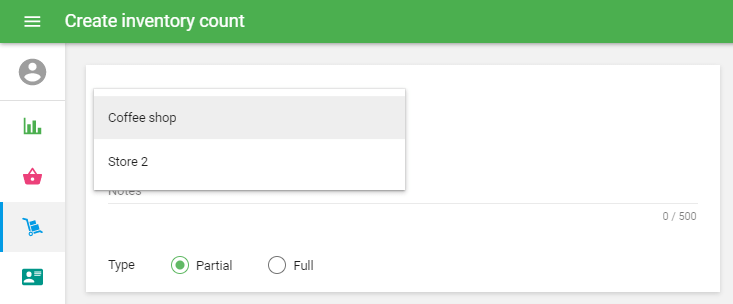
- Optionally, add any relevant notes in the Notes field.
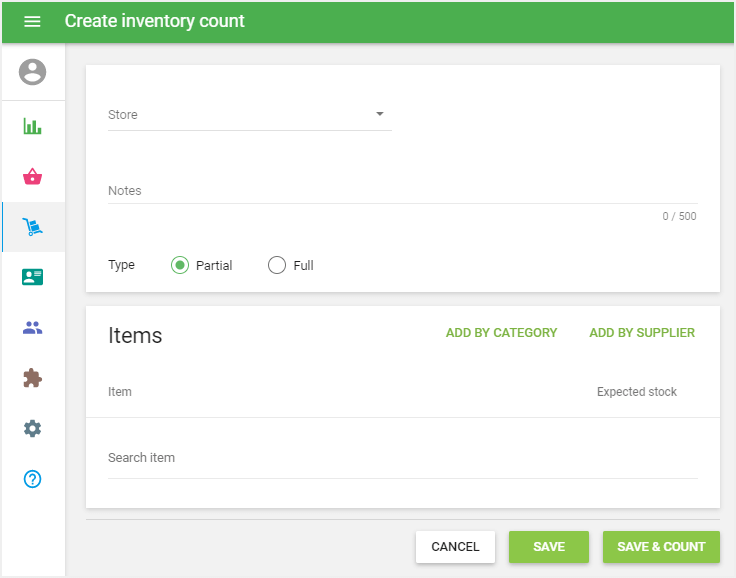
- Choose the count type: Full or Partial.
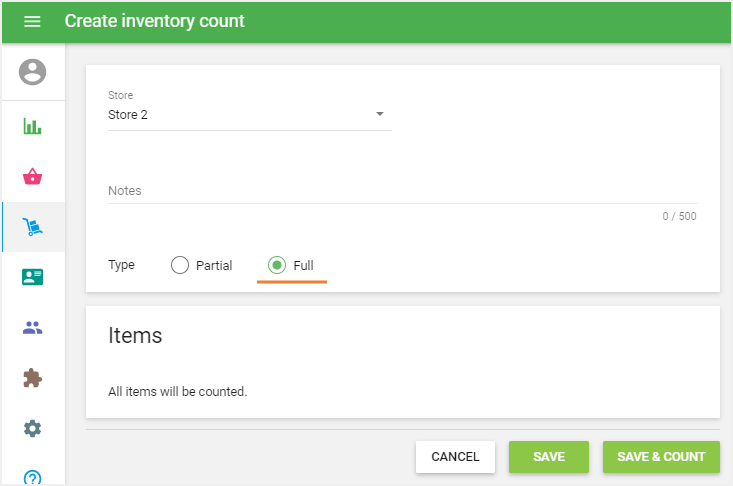
Full Inventory Count
All items with Track Stock enabled will be added to the document automatically — no manual item selection required.
Partial Inventory Count
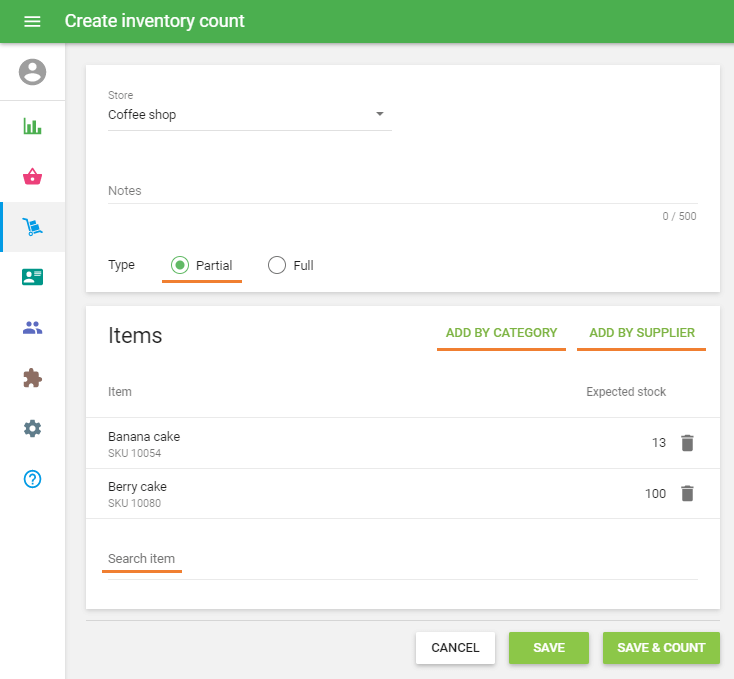
Add items to the count manually using one of the following methods:
- Search Item field — Add items one by one.
- Add by Category — Add all items belonging to a specific category.
- Add by Supplier — Add all items assigned to a specific supplier.
Note: Composite items and items with Track Stock disabled will not appear in the list. If a product has variants, each variant is shown as a separate row.
The Expected Stock column will show the current stock for each item in the selected store.
Click Save to create the inventory count document, or Save & Count to create it and begin counting immediately.
Counting Stock
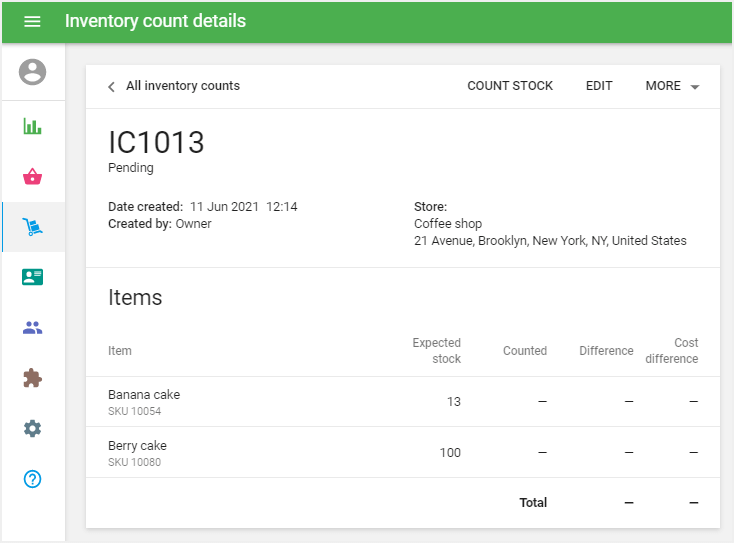
Click the Count Stock button to start the counting process.
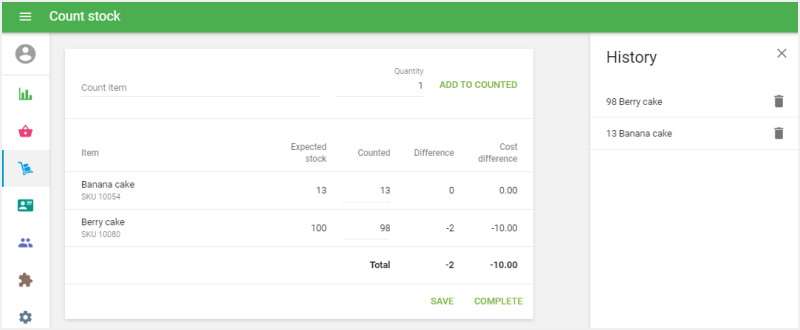
You can enter counted quantities in two ways:
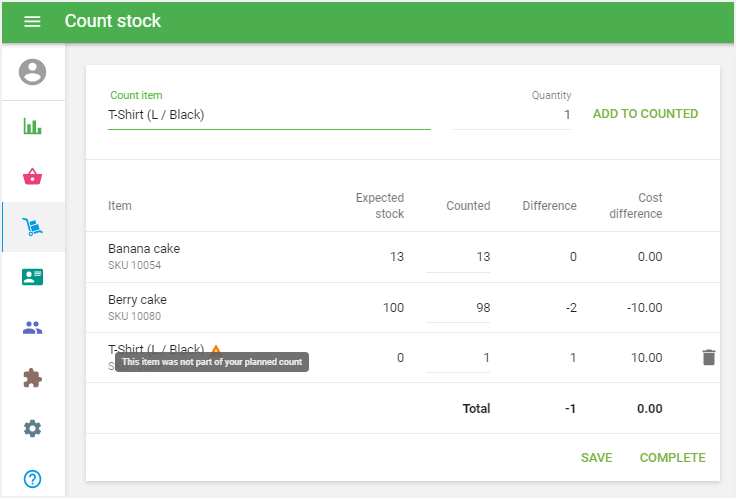
Option 1 — Count Item field: Search for an item in the Count Item field, enter the quantity, and click Add to Counted. You can also use a barcode scanner — each scan adds one unit and is logged in the history. This is useful when counting in blocks: for example, you can scan a barcode 10 times or simply enter "10" in the Quantity field.
Option 2 — Counted column: Enter the quantity directly in the Counted column of the item list.
Items Not in the Count List
If you add an item that was not part of the planned count (by typing or scanning), the system will flag it with a yellow warning: "This item was not part of your planned count. You can delete it or proceed."
Autosave and History
- The system automatically saves your count every 30 seconds to prevent data loss.
- A change history is displayed on the right side of the screen, allowing you to cancel any incorrect entries at any time.
Completing the Count
- Click Save to save your progress and continue the count later.
- Click Complete to open the Confirm Inventory Count window, then click Confirm Count to finish.
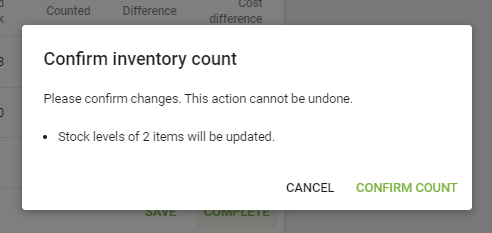
Once confirmed, the stock levels of all counted items will be updated accordingly.
Inventory Count Statuses
Status | Meaning |
|---|---|
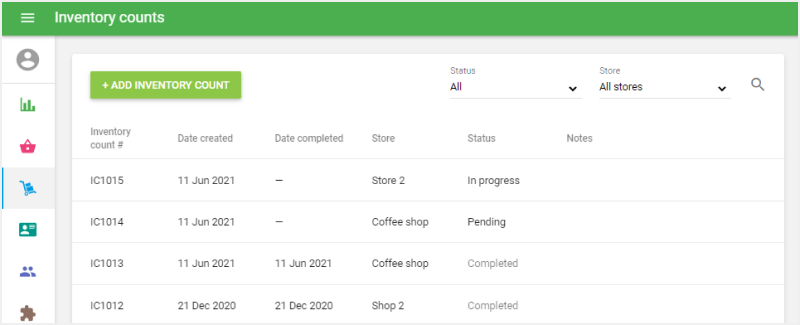
Pending | Count document created, but counting has not started. |
In Progress | Counting has begun but not yet completed. |
Completed | Count has been confirmed and stock levels updated. |
See also:
Advanced Inventory Management Overview
How to Work with Purchase Orders and Suppliers
How to Work with Transfer Orders
How to Work with Stock Adjustments